
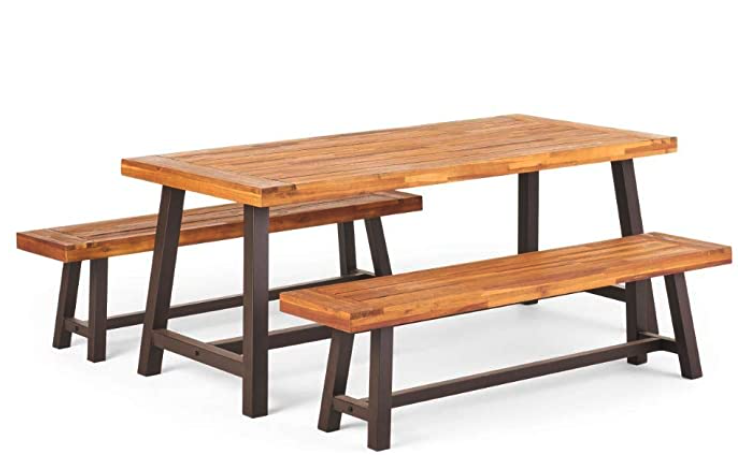


In 2016, I moved into a new San Francisco apartment with a deck. I wanted something like a picnic table that would let me host friends for food, do work outdoors, or have a surface I could use for messy outdoor projects like painting or sanding. I found this picnic table on Amazon.
One common complaint, which I ignored, was that the wood on the product was of poor quality and often showed damage within the year.
The other common complaint was that the wooden bench seats wouldn’t tuck under the table. As this was a small condo where space was a premium, this was a nuisance, but not a dealbreaker.
Seen here is that Amazon-bought picnic table, surrounded by lights and planters I put up to decorate the patio.
Sure enough, after four years of exposure to sun, high winds, fog, wayward sea salt, and whatever abuse my projects subjected it to, the picnic table was showing its age. The wood was a little rotted and saggy, and I thought there was a chance to make something nicer out of what was left.
I removed the original table and bench tops in order to salvage the metal frames. The frames had rusted a bit, and so I covered all parts in black Rustoleum, which would protect against future rust and look sharp with the wood.
I chose to use redwood to replace whatever wood had been on the table originally, because it’s durable, it’s locally native, and it’s beautiful. Downsides to it are that it can be a little soft, and so it’s vulnerable to dents. The toughest part about making the table was that I had a short amount of time, and no level surfaces to work with.
Table after initial construction. I modified the table dimensions to be slightly longer and slightly narrower than the original table layout, but the frame still worked well.
After a few rounds of sanding, the redwood took oil nicely.
They tuck! I made the seats around 2 inches shorter, and they were then able to tuck underneath the main table.